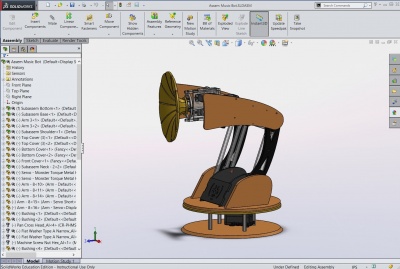
SolidWorks
SolidWorks is a widely-used 3D modeling software for engineering. It is used for rapid digital prototyping and mechanical testing in simulation. SolidWorks is a standard software used by millions of engineers around the world. It relies on modeling solid parts and then combining them into assemblies. SolidWorks has its own tools for publishing engineering drawings and laser cutter- and 3D printer-compatible files.
Contents
Learning SolidWorks
We recommend the tutorial built into the software or the SolidWorks Youtube channel. WPI is also working on its own SolidWorks tutorials, which can be found here: WPI SolidWorks Video Tutorial
Alternatives to SolidWorks
There exist many other 3D modeling software options, but noteworthy engineering-CAD options are AutoCAD, PTC's Creo, Solid Edge, and Catia. AutoCAD is the most popular CAD program in the world, and is generally favored by manufacturing facilities; Creo is popular in aerospace and flow analysis; Solid Edge is a less popular parametric feature and solid modeling software developed by Siemens; and Catia is another software produced by Dassault Systemes, the parent company of SolidWorks, Corp., which is popular in automobile and product design. SolidWorks is generally considered the friendliest of these CAD programs and supports model types that can be exported to the other CAD programs.
SolidWorks Getting Started Guide
Learning the software on your own can be somewhat confusing at first, so this is a guide to get started modeling.
Within SolidWorks, creating a new file opens a popup window, giving you options to create a "Part," "Assembly," or "Drawing."
Making a Part
A Part is the basis for creating an Assembly or Drawing, so begin with that. You will see several different panes, tabs, and menus.
The series of tabs across the top, which include Features, Sketch, and others, depending on your version and customizations in SolidWorks, is called the CommandManager. It contains all the tools used for modeling. To get started, enter the Sketch tab and pick a sketch tool.
The sketch tools are fairly self-explanatory in nature; the line tool sketches a line, the rectangle tool sketches a rectangle, and so on. Hover over each button for more information on the tool. Upon selecting one of these tools, a message will appear directing you to select a plane to sketch on. The three main planes, which are always automatically generated in a new part. Select one of the Top, Right, or Front Planes and begin sketching. To rotate around the model, middle-click and drag with your mouse or use Ctrl+1 to face the Front Plane, Ctrl+3 to face the Right Plane, and so on. The arrow keys can also be used to rotate around the model.
Once you create your sketch, head back to the CommandManager and select the Features tab. For the first sketch, generally only two features are available: Extrude Boss/Base and Revolved Boss/Base. Extruding a sketch will result in extending it along the axis perpendicular to your sketch into a solid body. By selecting Extrude, the PropertyManager pane on the left will give you options for how much to extrude the sketch, in which direction, and which pieces of your sketch, if you wish to only select some of them. Selecting Revolve, instead, will give you options for choosing an axis around which to revolve your sketch and a degree measure for how much you wish to revolve your sketch.
Once you are finished choosing your feature options, click the green checkmark in the PropertyManager pane on the left, or the one in the top-right corner of the sketch, or the one in the right-click menu to confirm your choice. Congratulations! You've built a part.
Making an Assembly
Assemblies consist of multiple parts combined together with "Mate" features. Create a new file and select "Assembly" in the window that pops up. In an assembly, the tabs in the Command Manager are different from those that show up when working with a part or drawing.
Making a Drawing
A Drawing can be made from a Part or an Assembly. Drawings are meant for sharing parts and assemblies.
Tip: In newer versions of SolidWorks, right-clicking and dragging up down, left, or right will also reveal more context-dependent options. These options can be customized in Tools > Customize > Mouse Gestures tab. You can even change it to have 8 options instead of just 4.
SolidWorks Tools Guide
This is a comprehensive guide to the functions of all the different buttons found in the CommandManager.
Sketch Tools
Advanced Features and Additional Tutorials
- table of tools, including how to add color, etc.
- list of resources
- advanced modeling tutorials - Mattias R on youtube
